How to Use a Blender Step by Step
Add liquid first, then soft and firm ingredients, and blend with the lid secured. Start at a low speed, increase as needed, and follow your blender’s manual for capacity and controls.
On this page (9 sections)
- How do you use a blender step by step?
- What order should you add ingredients to a blender?
- Which blender speed should you use?
- How do you blend thick or frozen ingredients?
- How do you use a personal blender?
- What safety steps matter when using a blender?
- How do you clean a blender after use?
- What should you do if the blender won’t start?
- Which blender setup suits your routine?
To use a blender, add ingredients in the order your manual recommends, secure the lid, and start at a low speed. Increase the speed as needed, stop to check the texture, and turn the blender off before removing the lid.
For many everyday blends, start with liquid, add soft ingredients, then add firmer or frozen pieces. Keep the total below the jar’s marked limit, and keep hands and utensils away from moving blades.
How do you use a blender step by step?
Prepare the ingredients, load the jar, secure the lid, blend, and check the result. These steps work for many countertop and personal blenders, but the manual takes priority for your model.
- Set the motor base on a dry, stable surface.
- Cut large ingredients into pieces that fit easily in the jar.
- Add ingredients in the order recommended by your manual.
- Check the maximum fill line and close the lid firmly.
- Choose a low speed or pulse setting to start.
- Increase speed if the ingredients are moving freely.
- Stop the motor before opening the jar to check or serve.
Don't run the blender if the jar, lid, or blade assembly is loose or damaged. If the motor struggles, switch it off and consult the manual before changing the mixture.
What order should you add ingredients to a blender?
Liquid usually goes in first, followed by soft ingredients and then firmer or frozen pieces. This order can help ingredients circulate, but some blenders have specific loading directions.
Pour in the liquid, then add ingredients such as yogurt or soft fruit. Place firmer items on top, keeping everything below the fill line.
Cut large pieces down so they fit without forcing them into the jar. If you’re blending ice, check the manual for guidance; our guide to putting ice in a blender explains what to consider.
How much can you put in a blender?
Stay below the maximum liquid line or fill mark on your jar. A jar’s total capacity can be higher than the amount of liquid it can hold.
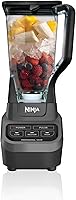
Leave room for ingredients to move and for the mixture to expand or splash. The Ninja Professional Plus BN701 has a 72 oz pitcher with a marked 64 oz maximum liquid capacity.
Choose a full-size pitcher if you often blend family-sized batches. A smaller personal blender may suit single portions; the NutriBullet NBR-0601 has a 24 oz cup.
Don’t assume a larger jar means you should fill it to the rim. Check both the ingredient level and the marked liquid limit before starting.
Which blender speed should you use?
Start low, then increase the speed once the ingredients begin moving. Use pulse for short bursts when you need more control over chopping or breaking up ingredients.
A low start can help limit splashing, especially with thin mixtures. For a preset program, use the option that matches your task and follow the manufacturer’s directions.
The Ninja Professional Plus BN701 has three Auto-iQ presets that combine timed pulsing, blending, and pauses. The Ninja Professional BL610 has manual push-button controls and four speeds.
Avoid guessing at long blending times. Stop to check the texture, and let the motor rest if the manual calls for it.
How do you use a blender pulse setting?
Press pulse in short bursts and check the ingredients between bursts. This gives you more control than running the blender continuously when you want a coarser texture.
Keep the lid secured while pulsing. If ingredients are stuck, switch the blender off and wait until the blades stop before adjusting them.
How do you blend thick or frozen ingredients?
Use the method your blender manual recommends for thick mixtures and frozen foods. Some blends need more liquid, smaller pieces, or pauses to let ingredients settle.
Start with an amount that leaves room for movement. If the blender stops circulating the mixture, turn it off before opening the lid, then follow the manual’s advice for adjusting ingredients or using a tamper.
Don’t force a utensil through the lid opening while the blender is running. A personal blender’s cup and blade design may also require a different blending method from a full-size pitcher.
If a smoothie is too thin, see how to make a smoothie thicker for ways to adjust the ingredients. For a different tool on small blending jobs, compare a blender and an immersion blender.
How do you use a personal blender?
Use the cup and blade assembly as described in the manual, and don’t blend with a loose cup. Personal blenders often use a cup that locks onto the motor base.
The NutriBullet NBR-0601 uses a push, twist, and blend method. It includes a 24 oz cup, extractor blade, and to-go lid.
Add ingredients without exceeding the cup’s fill limit. Once blending stops, remove the cup as directed and be careful when handling the blade assembly.
What safety steps matter when using a blender?
Keep the lid on, keep hands away from the blades, and switch off before opening the jar. Unplug the blender before cleaning or handling a removable blade assembly.
Set the motor base on a dry surface and keep the cord away from hot areas. If the jar leaks, the base shifts, or you notice damage, stop and check the manual before using it again.
Don’t blend hot liquids unless your model’s instructions allow it and explain how to do so safely. Pressure and steam can build in a closed container.
How do you clean a blender after use?
Unplug the blender and clean the jar, lid, and blade parts according to the manual. Rinse soon after use so food doesn’t dry around the blades or seals.
Some blender parts are dishwasher safe, while others need hand washing. The Ninja Professional Plus pitcher and stacked blade assembly are top-rack dishwasher safe, and the NutriBullet cups can go on the top rack.
Handle removable blades by their base or hub, not by the cutting edges. Follow how to clean a blender jar, lid, and blades for a fuller cleaning routine.
What should you do if the blender won’t start?
Check that the jar and lid are seated correctly, then consult the manual for your model’s safety locks and controls. Don’t keep pressing buttons if the motor base or cord looks damaged.
Some blenders need the container to lock into place before they run. If the issue continues, use our guide to common Ninja blender problems and fixes for troubleshooting steps.
Which blender setup suits your routine?
Choose a full-size pitcher if you regularly blend larger batches, and check its marked liquid capacity before filling it. The Ninja Professional Plus BN701 and Ninja Professional BL610 both have 72 oz pitchers, while the NutriBullet NBR-0601’s 24 oz cup fits a single smoothie.
For a first-time Ninja setup, follow how to use a Ninja blender. If your main concern is care, cleaning the blender properly is the next useful step.
Follow the manual’s loading and safety directions, start at a low speed, and stop to check the texture. This routine works across many blending jobs while accounting for differences between blender designs.
Frequently asked questions
What order should you put ingredients in a blender?
Add liquid first, then soft ingredients, and finish with firmer or frozen ingredients, unless your blender's manual says otherwise. This order helps ingredients move toward the blades.
Keep within the jar's marked liquid limit and avoid packing ingredients above the maximum fill line.
Should you start a blender on high?
Usually, start on a low speed or use a pulse setting, then increase once the ingredients begin moving. A gradual start can help reduce splashing and lets you check the texture.
Follow the manual, since control settings and recommended methods vary by blender.
Can you open a blender while it is running?
No. Turn the blender off and wait until the blades stop before removing the lid or adding ingredients.
If the mixture needs help moving, use the tamper only if your blender includes one and its manual allows it; otherwise, unplug before adjusting the contents.
How do you know when a blender is done?
Stop when the mixture reaches the texture you want and no large pieces remain, if a smooth result is your goal. Pause to check rather than blending continuously for longer than the manual recommends.
Thick mixtures may need a different method or more liquid.